Table of Contents
A manual drying rack purchase should begin with the actual laundry routine and room constraints. Before finishing a balcony, compare the proposed cable route with the supplier's current diagram. This guide helps buyers, distributors and project teams evaluate the manual drying rack through room fit, a representative sample and written acceptance criteria. Use the current configuration and instructions for any final product decision.
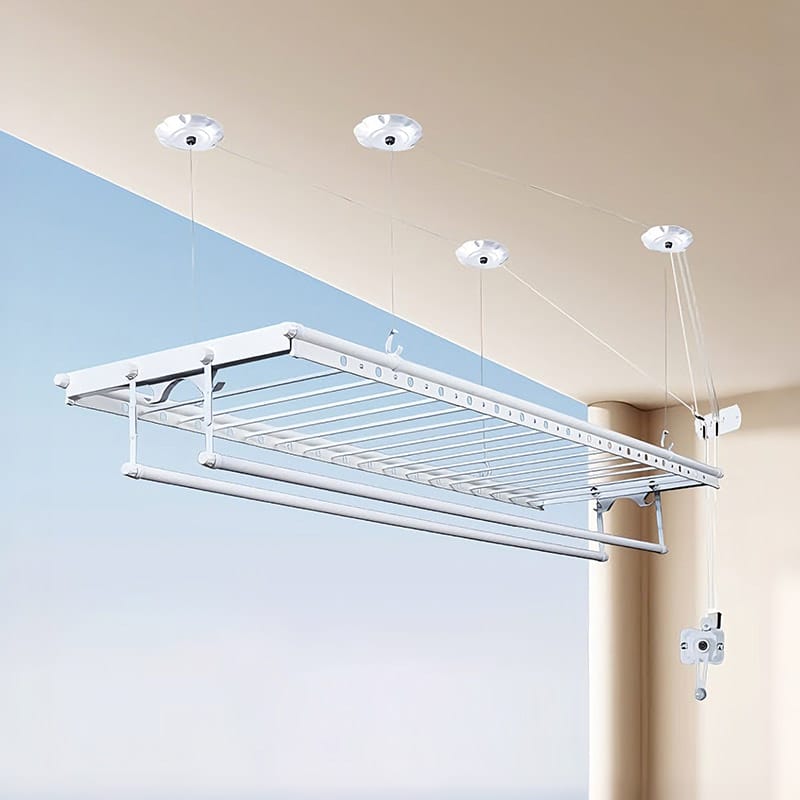
Cable Route and Pulley Review in practice
Before finishing a balcony, compare the proposed cable route with the supplier's current diagram. Check guide positions, changes of direction and clearance from trim or glazing hardware. Ask the installer to explain the route during commissioning and photograph visible sections. If movement feels inconsistent, stop and have the installation checked. Do not improvise a cable path merely because it is shorter or less visible.
The decision for this manual drying rack should be recorded against three specific points: cable path follows current drawing; guide alignment and clearance; commissioning record of visible cable. Keep the observation, the document reference and the person responsible for resolving any exception together. This turns a broad product enquiry into a review that another buyer or installer can follow.
Manual Drying Rack: understand the complete cable route
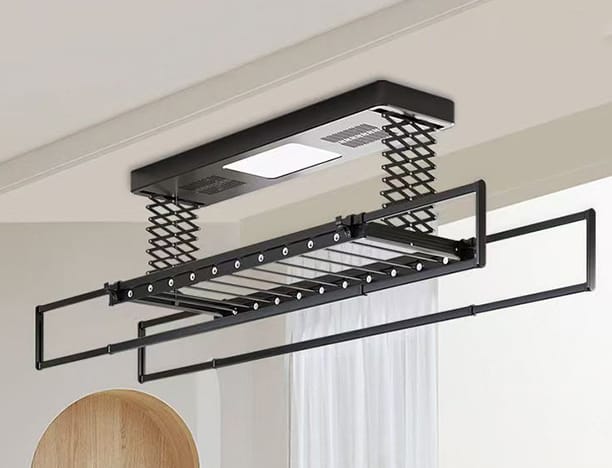
For a manual manual drying rack, the handle, guides, pulleys and rails form one system. Ask for a drawing that shows the intended cable path and the correct relationship between components. Smooth movement depends on alignment and installation, not merely the quality of an individual pulley.
Inspect a manual drying rack for visible rubbing, crossed cable runs or contact with adjacent surfaces using the manufacturer's guidance. Do not improvise a different route to avoid an inconvenient corner. If the planned room cannot accommodate the approved layout, request a supported alternative. Record cable-related observations at commissioning so later wear can be compared with the original condition.
Check the crank location and turning space
A manual manual drying rack should place the crank where the intended user can stand comfortably and turn it without striking a wall, door or appliance. Check the hand path through a complete rotation and the space occupied by the user's body. A suitable rail location can still be impractical if the handle is hidden behind furniture.
During evaluation of a manual drying rack, use the supplier's approved loading procedure and observe the effort through the travel range. Ask whether the handle can be repositioned and which configurations are supported. Avoid equating power-free operation with effortless operation for every user. Grip strength, reach and the wet load all influence the practical experience.
Distinguish indoor shelter from outdoor exposure
Specify the environment for the manual drying rack: enclosed utility room, covered balcony or open exterior. These conditions differ in rain, wind, sunlight and temperature. Ask the supplier which are supported and what evidence or instructions define the limit. An installation photograph under a roof does not establish all-weather suitability.
For the manual drying rack, record any exposure restrictions in the product listing and installer brief. If wind can move garments or rain can reach electrical parts, reassess the location with the supplier and installer. Do not borrow an outdoor claim from a superficially similar model. Matching the product to the intended environment is part of selection, not an afterthought after installation.
Inspect edges, joints and clothing contact surfaces
Review the manual drying rack where hands and garments make contact. Run the prescribed sample checks for burrs, rough coating, exposed ends and poorly seated caps. Pay attention to telescopic joins and removable accessories, where a snag can be less obvious in a catalogue photograph. Use safe inspection methods rather than bare-hand force on suspect edges.
The manual drying rack inspection record should show the location of a defect and the condition in which it appears. Distinguish a cosmetic mark from a contact point that can damage fabric or interfere with operation. Agree the acceptable finish with the supplier before production so the inspector has a concrete reference for the batch.

Use a mock-up to check compact rooms
A manual drying rack for a compact room deserves a full-size layout check. Mark its rail footprint and travel path with non-damaging temporary guides, then simulate loading with the intended garments. This reveals whether the apparent free space remains usable when the rack is down and a person stands beside it.
Trial the manual drying rack with the room in its normal state, including the laundry basket, appliance doors and stored items. Ask the intended user to complete the sequence from washing to hanging to collecting. Record conflicts rather than relying on a tidy empty-room photograph. The best result is a practical routine that fits the actual room, even if that requires choosing a smaller or differently arranged rack.
Choose useful capacity before adding dimensions
The capacity of a manual drying rack depends on wet load, rail spacing and the garment mix as well as overall width. An extended rail can offer more hanging positions, but the structure and mechanism still have a stated limit. Confirm any conditions that apply when a telescopic section is fully extended.
Plan a manual drying rack around the household's routine load. Leave enough room for air to move and for garments to hang without touching obstacles. Do not treat every hole as a usable simultaneous drying position for every garment. If the weekly load varies, compare a fixed core arrangement with an optional secondary drying area rather than oversizing the main installation without checking clearance.
Use a pilot order to test the sales process
A pilot batch of the manual drying rack can test more than the mechanism. Follow the order from quotation through receipt, installation or assembly, customer handover and support. Record which questions recur and whether staff can locate the correct documents and parts. Set the pilot scope and review period before it starts.
For the manual drying rack, distinguish observations from assumptions about a larger rollout. A small pilot does not establish a lifetime failure rate. It can reveal unclear instructions, unsuitable carton sizes, missing accessories or a mismatch with the intended room. Resolve those findings and update the approved configuration before repeating the purchase.
Close the evaluation with a decision record
Approve the manual drying rack only after the team has resolved the questions that affect its use: fit, loading, operation, documentation, supplied parts and support. Summarize the selected configuration, accepted limitations and remaining commercial conditions in a short decision record. Attach the photographs and drawings used in the evaluation.
The record for the manual drying rack should explain the practical reason for choosing it. It may be the loading height, a suitable base, a manageable manual mechanism or a clear service route. Keeping that reason visible helps future orders stay consistent and prevents an apparently similar substitute from being accepted without checking the conditions that mattered originally.
Decision checklist and comparison
Use the following comparison for the manual drying rack evaluation. The alternatives describe evidence quality, not a claim that one brand always performs better. Resolve missing information before accepting an equivalent product or releasing the batch.
| Approach | When it may fit | Confirm before choosing |
|---|---|---|
| Hand-cranked ceiling rack | Power-free height adjustment suits the user and room | Crank clearance, cable route, holding and lowering procedure |
| Fixed overhead rails | A permanently reachable position works for the garment mix | Safe loading reach, mounting and clear space below |
| Powered lifting alternative | The project benefits from powered adjustment | Electrical provision, controls, support access and added service components |
Product configuration to discuss
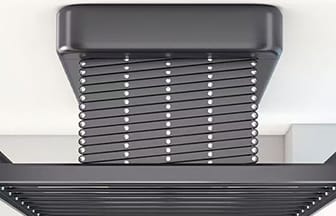
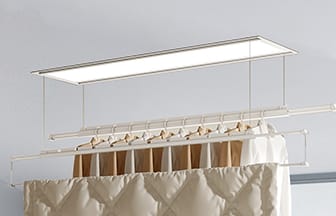
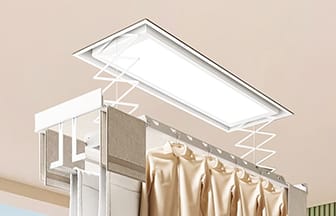
For a relevant starting point, review YIHUI Hand Ceiling Laundry Drying Rack with YIHUI. Treat the listed product as a candidate for the manual drying rack brief and confirm the current drawing, included components, finish and installation or assembly requirements. Product-family photographs do not establish that every option is supplied together.
Compare the relevant YIHUI product category and ask about configuration and supply services. Keep requested features separate from those already confirmed for the selected model.
Independent reading
For independent background, read Wikipedia overview of drying-rack designs. Use this background to understand the names used for different rack arrangements. Confirm specifications from the supplier rather than treating a general overview as a model test.
Request a configuration review
Send YIHUI your manual drying rack brief with the intended market, room or storage dimensions, routine laundry type and planned order quantity. Include cable path follows current drawing as a specific review item. Ask for a configuration proposal and sample plan before committing to a bulk order. Use the enquiry form below or the contact page to start the discussion.
Frequently asked questions
What should I check first for a manual drying rack?
Begin with cable path follows current drawing. Match it to the actual room or sales brief, then confirm the current configuration and instructions. A sample should demonstrate the feature that determines your purchase decision.
Which documents should accompany a manual drying rack quote?
Request a current drawing, feature list, packing list and installation or assembly instructions. For this brief, also document guide alignment and clearance. Ask the supplier to identify options and any unresolved differences.
How should I evaluate a manual drying rack sample?
Use the intended garments, hangers and room or display conditions. Record the setup and observations so another person can repeat the review. Include commissioning record of visible cable in the acceptance record.
Can a similar-looking manual drying rack be substituted?
Review the supplied revision, dimensions, components and instructions before approving a substitute. Similar appearance does not establish compatible controls, an equivalent mechanism or the same permitted loading conditions.
What information helps YIHUI review my manual drying rack enquiry?
Supply the destination market, quantity, intended use, useful dimensions and required functions. State that the main topic is cable route and pulley review and include photographs or a sketch where these clarify the practical constraint.